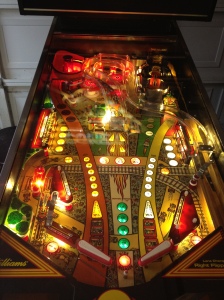
Haley’s, Katrina, and Car Chases

Day.. ah hell, I don’t even know how long this Comet has been in my garage now.. 23 days? 25 days?  Too long.

I added a few shots of the hacked board work that I started with.  Replaced the lamp matrix connector that was toasted and replaced the GI connector and all the lamps work great.  On to the switch matrix, I replaced the toasted and missing transistor along with the toasted and missing resistors and the two resistor banks.  Little before and after:

But she still doesn’t work.  Column 5, which is what the missing transistor and resistor controlled, works great.  Column 4 however, where the resistor is toasted (the brown striped thing in the left picture, count 4 over from the left), anyway Column 4 has issues.  Whenever ANY switch in column 4 is pressed the entire row activates, which is a huge problem because nearly every row has at least 1 Tilt attached to it.. so the game tilts constantly.  So the next thing up the chain is U45, which is that chip to the left of the resistors, got it on order.. moving on…

So on to the special solenoids.. wow these are jacked up..

So all this is now cleaned up and a bunch of transistors replaced but it’s still having issues, on to the next item up the chain, two more ICs (chips) U6 and U7.. on order.

So in the meantime waiting for these parts to arrive I got another one lined up in the queue.  Getaway High Speed 2.  Only 1 pic so far.. has some issues, nothing too crazy.

And I got started on the Whirlwind.  All the ramps are removed, most of the playfield has been cleaned up, replaced the center spinner decals.  Work in progress, much nicer than the Comet though.

More work on Whirlwind tonight…

Enter the Dragon.. err.. Hakko 808

Have you ever used a tool for a long time and been like, “Man, this tool sucks.  I need to bite the bullet and get such-and-such instead.  I wonder if it’s really worth the money.”  Well, if you ever find yourself doing any sort of PCB work for any length of time you’re going to run into the desoldering dilemma.

Do I use this crappy copper braid?  No, that sucks and you need like twelve hands to use it properly.

Do I use this suction bulb thingy?  Oh god that’s worse, maybe if you need to clear snot out of your nose you can use that, but for solder, forget it.

How about this soldapult thing, it’s like an upgraded snot sucker.  It works okay.. no wait.. it doesn’t.  It sucks (and not in a good way) and here’s why…

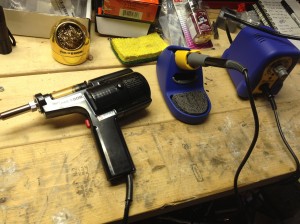
Enter the Hakko 808.. it’s like unicorns and puppy dogs started a damn parade in my garage.  Rainbows came out and a jolly leprechaun did a jig over by the hot water heater.  If you must desolder, just go get one.  Don’t think, just go get it.

My first 9-pin header pin removal took all of 2 minutes and 19 seconds, and that’s using this thing for the very first time.  I’m in awe.  Not just in the speed of this thing but how clean those pads look afterward.. ridiculous.  I have seen the light.  Also, the new Hakko 888 soldering iron is the tits as well.

Anyway, so the driver board header pins and GI connector are done (obviously).  Need to pull the mpu and work on that next.  Pulled off all the ramps on Whirlwind last night.  Have a Getaway and a Monopoly coming later this week so I gotta get this Comet OUT of the garage.  Hopefully finish it up tomorrow night.

Some Comet pics, more can be found here.

And some Whirlwind pics, more found here.

Rampin’ up and out..

Day 17:  Ramp ramp ramp.. finally the ramp is done.  Sanded down the epoxy, spray painted the orange (2 coats), taped it off and then hand painted the black.  Reinstalled.  It’s not “new” but I think it turned out pretty well.  Note:  If you’re going to spray paint something like a ramp, wipe it down with Naphtha.  If you don’t, all that waxy silicone crap and wax that’s been building up from cleaning it over and over is going to give your spray paint a nice fish eye texture (which is bad).

Nobody wants the fish eye, trust me.  

Here’s what fish eye looks like when painting in case you’re like, “What the hell are we talking about fishing for, I thought this was about pinball?”:

Enough about fish, back to ramps.  Here’s a little Day 1 vs. Final product:

Also got the package with the correct bulbs from Cointaker; installed them and sent back the old ones.  So now I’m just sitting here waiting on a new soldering iron and not doing much of anything.  Everything is done with this machine except for the board work I need to do.

I took some initial recon pictures of the Whirlwind that’s been sitting in my garage now for quite some time if you’re bored and feel like looking at what’s next in the queue.

So I’m not sure when it happened but as I’m standing in my garage tonight looking at these two machines I realize that the shopped Comet now puts the Whirlwind to SHAME.  These are pretty much final product pictures minus the GI (because the boards are pulled so she no lighty; no flash flash, no beep beep)…  Oh!  I do need to put in some custom instruction cards.. whee!

Patina is for Coin Collectors…

Day 15:

Alright so I’ve had a few days off here without posting anything.. what the hell has Matt been doing?  Slacker.. probably spending time with his family or something.  But NO, that would be selfish of me.  Instead I took a trip over to Kingsport for the pinball auction on Saturday (didn’t buy anything, all the prices were a bit high and the quality was a bit low), then a little pinball tournament on Sunday.  And I do have a job I actually go to from Monday-Friday… so there’s that.

Anyway, enough excuses.  What did we do tonight…

Got the remaining LEDs in the mail, some orange, some red, and some warm white frosted.  Apparently there was a mix up at the old Cointaker factory as 67 of the 70 “warm white frosted lamps” turned out to be “cool white frosted lamps.”  That won’t do.. not on this game.  They’re sending me out some new ones, great response from them on a Sunday afternoon.

So next I pulled the power board with every intention of starting the work on the connectors.. and then my soldering iron crapped out on me.  I take this as a sign I am not to do any electrical work today.  Ordered a new soldering iron and moved on to some less involved undertakings (Hakko 888 in case you’re interested, decided it was time to move up in the desoldering world while I was at it and ordered a Hakko 808 to compliment it.  Hey, I said I didn’t buy anything at the pinball auction.. I gotta buy something)  .  On to ramp repair!
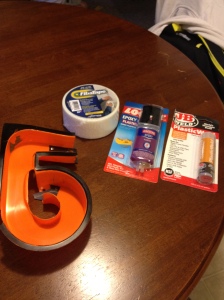
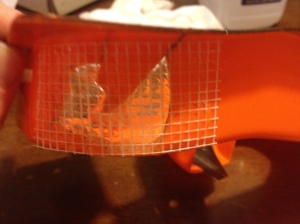
So they have a reproduction of this ramp but I’m already at the owner’s budgeted limit but I can’t leave a giant freakin’ hole in the thing so let’s get creative.  I did something similar to this on the Space Shuttle I restored as there was no replacement ramp for  that game (at least not when I was restoring it).  Little two part plastic epoxy, some clay-type plastic compound and a little fiberglass mesh tape (the kind you use to  sheetrock with).  Mesh tape first, then the liquidy two-part epoxy, then the clay epoxy last.

Wait for 24 hours.  After that I can sand it down to nice smooth edges and hopefully everyone is none the wiser, especially after I spraypaint it and it sits all the way in the back left corner of the game.  We’re looking for functionality here.  (You’re probably looking at that last picture and thinking, “Holy crap!  What has he done to that poor ramp??”  Don’t worry, it’ll all work out in the end, trust me…)

Alright so that’s done and curing for the next 24 hours so what else can we do?  The drop target decal arrived so let’s go ahead and put that on and get rid of that key that’s still hanging out serving as a drop target push lever (or whatever you call it).

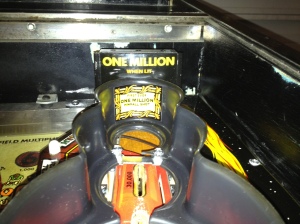
Also got the “Million point” decal for the cycle ramp so we’ll stick that sucker on there and then on to some cabinet touchup.
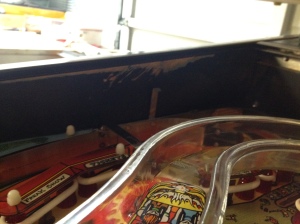
Wow, look at all that crappy scratched up paint inside the cabinet (and outside for that matter), let’s do something about all that, I’m sick of looking at it.  We’re not collecting coins here, I don’t find any joy in looking at a beat up old cabinet.  But who’s going to pay to redecal a freakin 1985 Comet?  Good thing for us it’s all black.. man I love touching up black cabinets… no mixing colors, no guessing if it’ll match, no worries about not having enough paint.. it’s black.  Just get to work.  Personally, I use good acrylics, not that cheap American Heritage crap, the stuff in the tubes.  It just goes on smoother and lays flat without all the globbing you get with the cheap stuff.

So what’s left now?  Board work.. LEDs.. finish off that orange ramp.. and it’s done.

So here’s some before/after (mostly after) of the touchup.  As always, more can be found on the Comet page.

RE-assemble.. RE-E-ASSEMBLE! (and some more board recon)

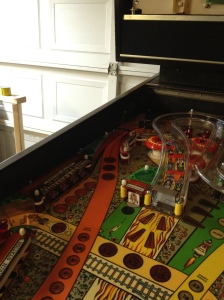
Day 11:  Getting pretty close to having the playfield complete.  Finished cleaning the ramps and plastics and a few bits of hardware here and there.  Everything on top is back together except the corkscrew ramp and surrounding plastic as I still need to repair it.  But for the sake of nice pictures I placed it in there.  Little before and after for aesthetics sake.

So it’s on to the board work!  First things first, lets get all of these general illumination lights working.  I was 99% sure it was just a bad connector.  So out with the Trifurcon pins and crimper…

At first I thought it was just poor connection from the wires to the actual connector housing and I’d just have to replace the connector itself.  Well after closer inspection that was part of the problem but pin 4 is fried, so I need to pull the power board and replace the header pins.  But after just replacing the connector the GI works, so that’s a good sign.  If I were to NOT replace the header pins then eventually heat would build up and just fry the new connector.

Alright so while we have the back open lets take another look at that lamp matrix (the one with all the wirenuts).  Ah crap, the connector is warm already after about 2 minutes of power being on.. that means.. we take a closer look at the header pins on this one too because I suspect…

Yep, those are the original header pins (the white thing with all the metal pins sticking out of it).  So that needs to be replaced as well.  I guess that part of the board toasted out and they just replaced the connector (and then wirenutted it… whatever).  Okay so header pins on power board, connector from transformer to GI connector needs to be replaced, header pins and connector on lamp matrix.. what else?

Let’s look at those transistors as I know the left pop bumper is shorted because I tested it before..

Argh.. someone has been here before.. and it’s not pretty.  Not horrible, but certainly not pretty.  You can see where they’ve lifted a few traces and had to lay down some solder to make the connection again.  Well luckily right now only one of those transistors is shorted so we’ll replace it and move on our jolly way.

Let’s spraypaint something.. I’m sick of looking at boards.  This is the metal housing that goes on the back of the Jump Ramp lamp housing.  Paint is flaking.. spray.. good to go.  It’s drying, I’ll get some pictures of the finished product later.

Also got a tip from someone on Pinside about Bay Area Amusements carrying the drop down target decal so I got that ordered.. yay!  And someone else posted a pic of all the decals in case anyone ever is wanting.

So right now I’m still waiting on an electronics order from Great Plains in order to start the board work.  The Million decal, the drop target decal, and a few more LEDs from Cointaker.  In the meantime I plan to start on the ramp repair and some cabinet woodwork and touchup.
Again, as always, more pictures here.

Bumpers and Ramps, Ramps and Bumpers

Day9/10: Cleaned both ramps two nights ago but didn’t feel like posting, “I cleaned the ramps”, so I waited until I actually accomplished something a little more noteworthy.

The orange ramp has various cracks and blemishes, the most prominent being that giant hole in the picture to the left. I’m thinking a little repair is in order but we’ll get to that at a later date. For now, it’s clean, along with the clear ramp which I didn’t take any pictures of. Was going to try out the new torch on the clear ramp but it cleaned up really nicely with some Novus 2 and I’m pretty sure there’s no replacement out there for it, so always a little risky going that route. Nobody wants to end up with a hot mess on their garage floor.

So here’s some “before” pictures for your edification. Apparently I forgot to take “after” pictures so you’re just going to have to grab a big bag of patience and wait for a later post.

Alright so the ramps are clean but still need some work. On to something near and dear to my heart, pop bumpers. I’m pretty sure in hell there is a giant workbench filled with a long line of pop bumpers that need rebuilds, it’s that fun. And really, the actual rebuilding of the coil/pop bumper isn’t really that bad, it’s the lamp sockets and namely the lamp socket leads that are the true horror.

I don’t know who designed these things but it’s just a BAD design that says, “please don’t try to take me apart and put me back together.” You see these metal leads come down from the lamp socket and run under the playfield and then through the metal pop bumper assembly and then are directly soldered to some bare wire. There’s usually a small piece of clear tubing to prevent the metal leads from touching the metal assembly. There’s no easy way to disconnect them. The metal wire is stapled directly to the playfield. I believe if I can fabricate a 44-size lamp lead that’s insulated and has a quick disconnect that fits in these old Williams pop bumpers I’d be rich. In fact, at some point I believe they did start using insulated wires which, in theory, would make the job so much easier. But alas, they don’t fit in the old-style Williams pop bumper housings as they use the wedge base bulbs and there isn’t enough clearance. See those black wires there? Well, I knew this already but for some reason I bought some anyway in a flash of brilliance thinking they may fit and make my life easier. Nope.

Here are the dead soldiers. Note ALL of the metal yokes are broken, common. On a pop rebuild I try and replace everything but the coil and assembly housing. All the rest gets trashed. Did I mention what a pain they are to put back together, you don’t want to be doing this again to replace a bad spring, just do it all at once so you don’t need to mess with it again for another 25 years.

After you yank out all the baddies it’s a good time to get at that playfield with a little Novus 2, maybe a magic eraser and some alcohol.

And the final comparison.

She’s starting to come around! Thus ends the pop bumper battle.

Still left on the to-do:

  • Repair orange ramp.
  • Reassemble the rest of the playfield.
  • Replace all the coil sleeves.
  • Fix the connector and board issues in the backbox.
  • Repair and touch up some of the cabinet.

As always, more pictures can be found on the Comet page if you’re so inclined.